
In this article:
Introduction
How can you tell whether your SEO changes have had the effect you intended?
RankSense is able to track pages that have a certain SEO problem or that you are applying a particular fix to. Then, you can monitor the traffic on those pages over time to see what the impact the SEO changes had.
You can also monitor pages that are experiencing a particular problem or monitor a particular set of pages (i.e. blog pages).
This article is about how to set up the tags on RankSense. For more details on which tags are available and how to best use them, see “Types of tags.” After the tags are set up, you can monitor the results to validate your changes.
Tags should be set up at the time that you publish SEO rules. If you have already published your rules, don’t worry! You can delete them and re-publish with the tags in place.
Prepare rules sheet
Prepare your rules sheet with only one type of SEO fix on the sheet.
For example, if you are publishing canonical tags, some tags may be used to canonicalize duplicate content while others are used to add a self-referential canonical. You would need to separate these into two rules sheets if you would like to track the issues separately.
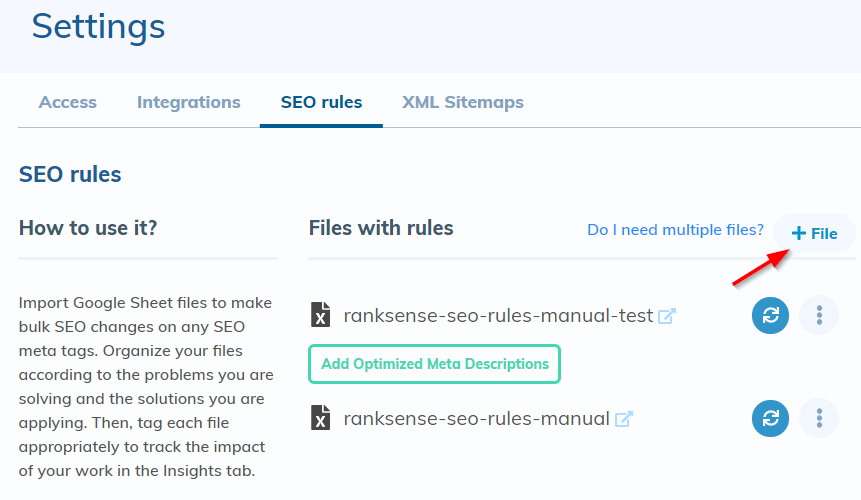
In the RankSense Settings, go to SEO rules, and click “+ File.”
Add your spreadsheet URL beside “Import.”
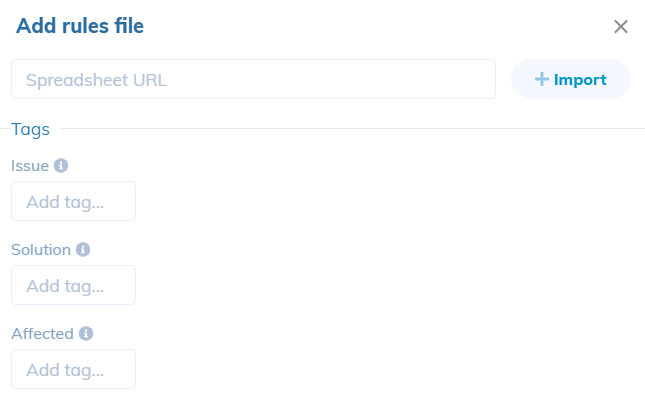
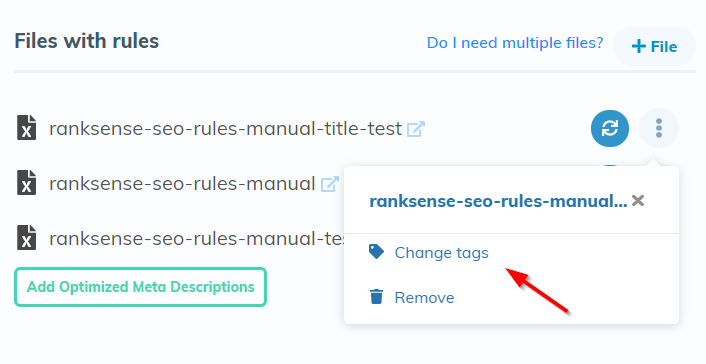
Do not click the “+ Import” button yet. If you click it by mistake, don’t worry – you can add or modify the tags after importing. Click the three dots beside the rules sheet and select “Change tags.”
Select tags
Next, select the tag or tags to apply.
RankSense has three types of tags:
- Issues - These are SEO problems, such as important pages not being indexed, duplicate content, and meta tag issues.
- Solutions - These are SEO fixes that you are applying, such as noindex tags, canonical tags, or meta title changes.
- Affected pages - These are types of pages, such as blog posts, product pages, and category pages.
For each type of tag, you can click box for that tag type to see a list of available options. You can choose multiple tags, i.e. one issue, one solution, and a page type.
When you have chosen your tags, click the “+ Import” button beside the spreadsheet URL. You can also edit the tags after you’ve imported, but before publishing, using the three dots next to the rules file and selecting “Change tags.”
For more details on which tags are available and how to best use them, see “Types of tags.”
If there is a tag that you feel we should add, please let us know.
Publish rules
Decide whether to publish to staging or production. We recommend publishing the changes on staging first and verifying them using our Chrome extension.

Click on either “Staging” or “Production,” then click “Publish.”
See the article on publishing for some important tips on verifying that your rules are imported correctly, and published to either staging or production.
If you already published rules and would like to add tags, simply remove the rules using the trashcan icon beside the spreadsheet, and then follow steps 1-3 above.