In this article:
Introduction
You may need to edit your installation for such reasons as:
- If your dashboard is not receiving data, RankSense may have been set up on the wrong subdomain (i.e. https://example.com instead of https://www.example.com).
- If you have a part of your website that you do not want RankSense to monitor.
- If you have more than one subdomain you would like to monitor, or one that you would like to stop monitoring.
- If an upgraded version of RankSense is available.
Here is how to make those changes.
Edit installation on main domain
If you need to change the subdoman that is monitored (rather than add one), you can follow these steps. You will also have the option to exclude part of your site from being monitored.
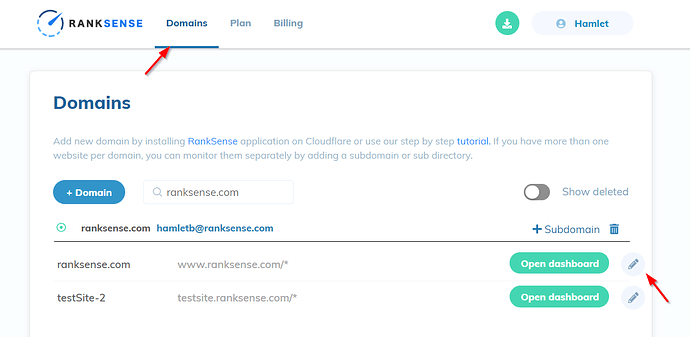
- Go to your RankSense dashboard and click “Domains.” Click the pencil icon beside the subdomain you wish to edit.
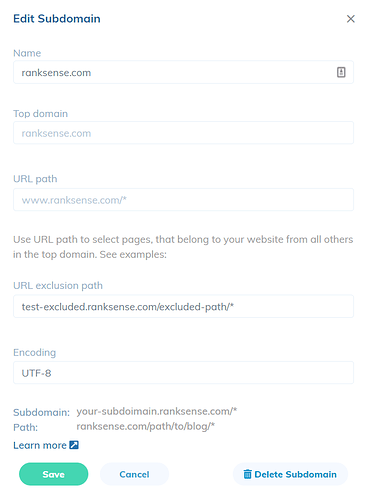
- Review the settings in the window that appears.
Name
This is how RankSense will list your site, but it doesn’t effect the app in any technical way.
Top domain
This is the domain of your site, with no subdomain or paths.
URL path
This is the URL path for your site, with the subdomain. There is an asterisk as a wildcard to indicate that RankSense will be active on the entire subdomain.
Make sure that this is where your site’s content exists. If your site uses “www” in the URLs, then “www” must be included here. If your site does not use it, i.e. https://example.com, then you need to omit it here as well. You can choose some other subdomain if you like, but in most cases, you would want to add a subdomain rather than replace the main one here.
URL exclusion path
By default, RankSense will monitor all URLs on the subdomain, and will be able to create rules for all URLs on the subdomain.
You may not wish for RankSense to be active on certain parts of your site. You can indicate the URLs that should be excluded here. You’ll need to use an asterisk wildcard if you want to indicate a pattern of URLs. Without an asterisk, you are only excluding a single URL.
Example of how to exclude a pattern of URLs for the blog of ranksense.com:
ranksense.com/blog/*
However, if we used the line below, only one page would be excluded.
ranksense.com/blog/
Add or delete a subdomain
You can use RankSense with multiple subdomains, but each will have a separate dashboard.
To add a subdomain
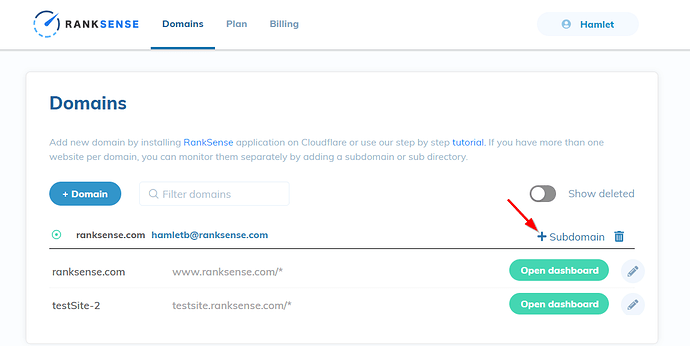
- From your dashboard, click the gear icon, or visit https://dash.ranksense.com/domains
- Click + Subdomain
Fill out the form that appears. It is the same form as in the “Edit Installation” section above.
To remove a subdomain
- Click the pencil icon beside the subdomain. Click “Delete subdomain” at the bottom of the form that appears.
Update RankSense
We are continually making improvements to Ranksense, from bug fixes to new features. To have the best possible experience with RankSense, we recommend updating to the most recent version.
To update RankSense
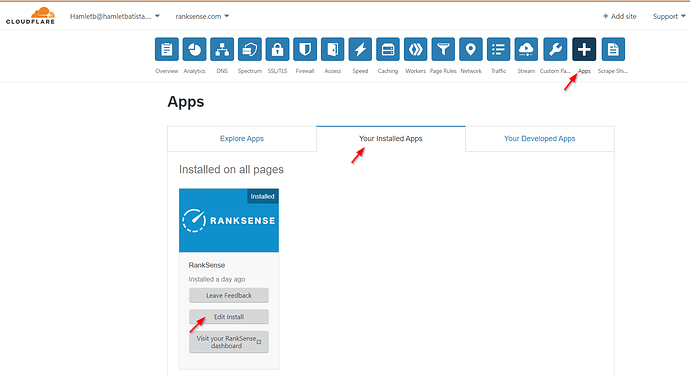
- Go to your Cloudflare dashboard. Clicks “Apps” in the top row of icons.
- Click “Your Installed Apps” and find RankSense. Click “Edit installation.”
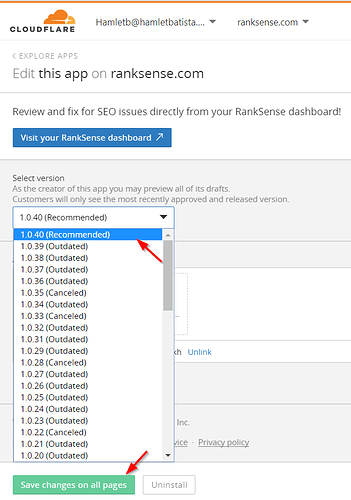
- Select the Recommended version from the drop-down menu.
- Click “Save changes on all pages.”
- Cloudflare will ask you to review the permissions for the app.
- You may also receive a message warning you that the Cloudflare proxy is only partially enabled. If this happens, click “Visit DNS settings” and review your settings to ensure the proxy is enabled for your domain.

