In this article:
Schedule rules to be published
When publishing rules to production, you have the option to schedule for a future time. Click the “…” beside the Publish button.
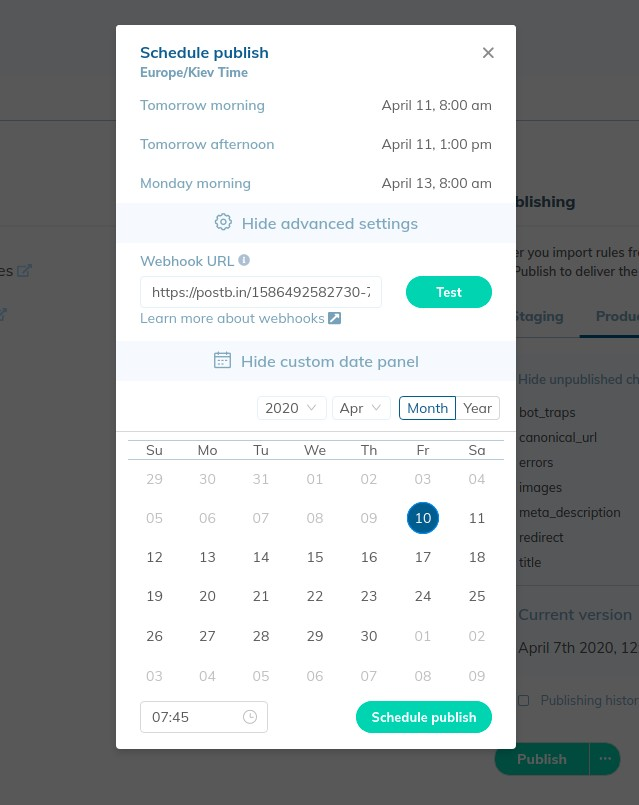
There are some pre-set options that will appear:
- Tomorrow morning
- Tomorrow afternoon
- The next Monday morning
Click “Select custom date and time” to choose another time.
Receive confirmation via webhook
You may wish to trigger an automated action once your rules are successfully published. For example, you might want to request fast indexing in Google or Bing.
This can be done using a webhook. RankSense relies on webhooks to communicate rules publishing success (or failure) to other apps or custom services.
To set up a webhook, click “Show advanced settings” to provide a webhook URL. When the rules are published, RankSense will send a post request to the URL that you provide.
You can create a test webhook URL using Postbin. Simply click on Create Bin and add the new Bin ID to the end of the URL, like this https://postb.in/BIN-ID.
You can provide this URL in the webook URL field and click on “Test.” You should see results like this when you refresh the page.

After you test that works, you will need an actual service to receive the webhook requests. One simple approach is to write Cloud Functions in your favorite platform provider (Azure, AWS, GCP, etc).
Here is an example Python based Cloud Function that we have tested in Google Compute Cloud.
def main(request):
    """Responds to any HTTP request.
    Args:
        request (flask.Request): HTTP request object.
    Returns:
        The response text or any set of values that can be turned into a
        Response object using
        `make_response <http://flask.pocoo.org/docs/1.0/api/#flask.Flask.make_response>`.
    """
    ranksense_webhook = request.headers['rankSense-webhook']
    print(f'RankSense: {ranksense_webhook}')
    request_json = request.get_json()
    """Request payload:
        {
            'domain_name': 'String',
            'website_name': 'String',
            'website_id': 'Integer',
            'rules_amount': 'Integer',
            'published': 'Boolean',
            'schedule_date': 'Datetime'
        }
    """
    print(request_json)
    return f'Ok!'
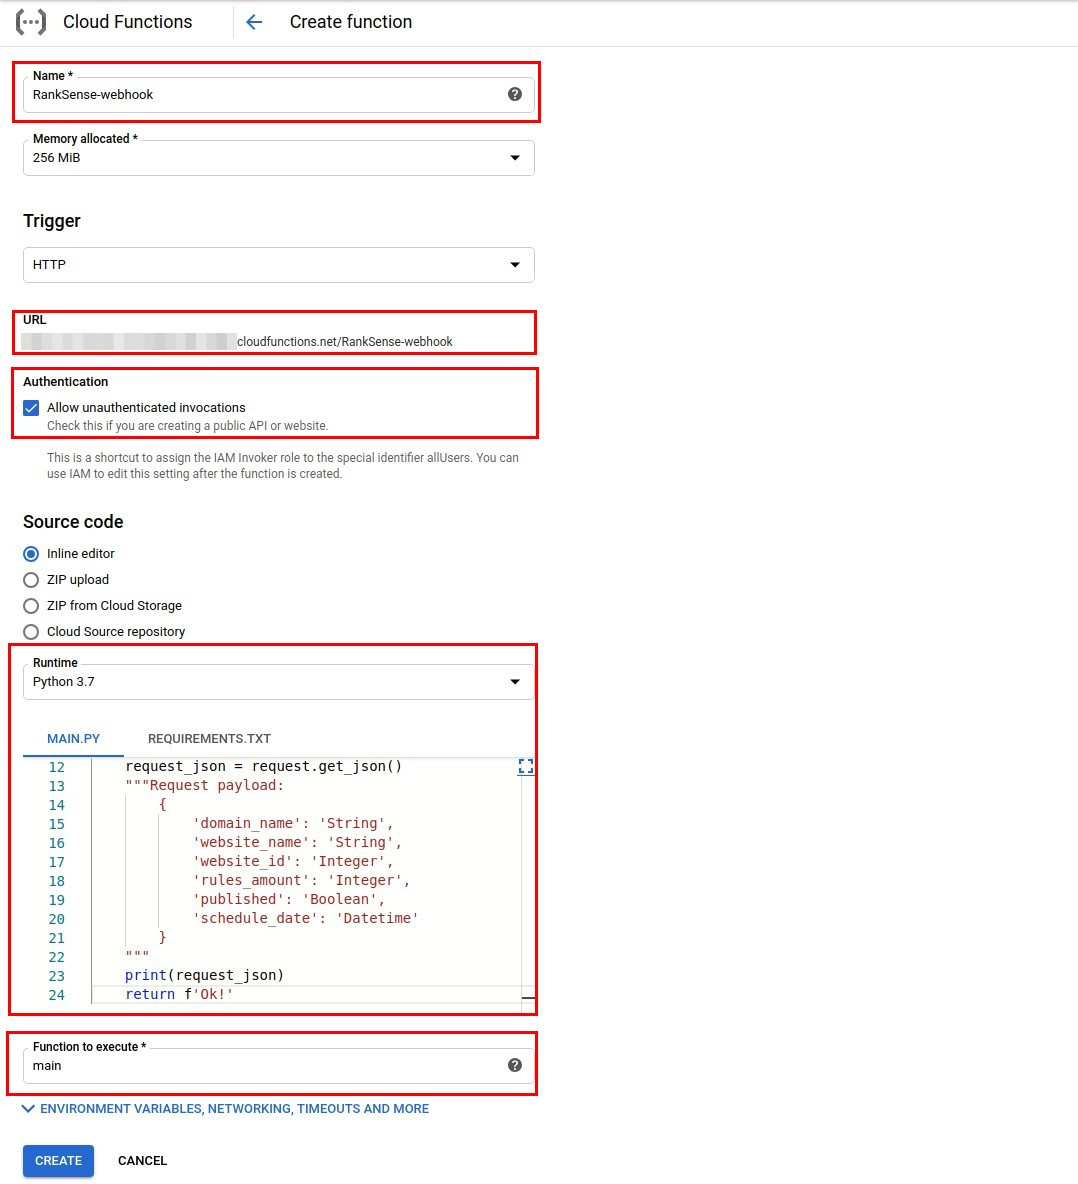
The CloudFunction will need to be configured on Google Cloud. Please refer to the official documentation: https://cloud.google.com/functions/docs/how-to
Here is an example configuration:
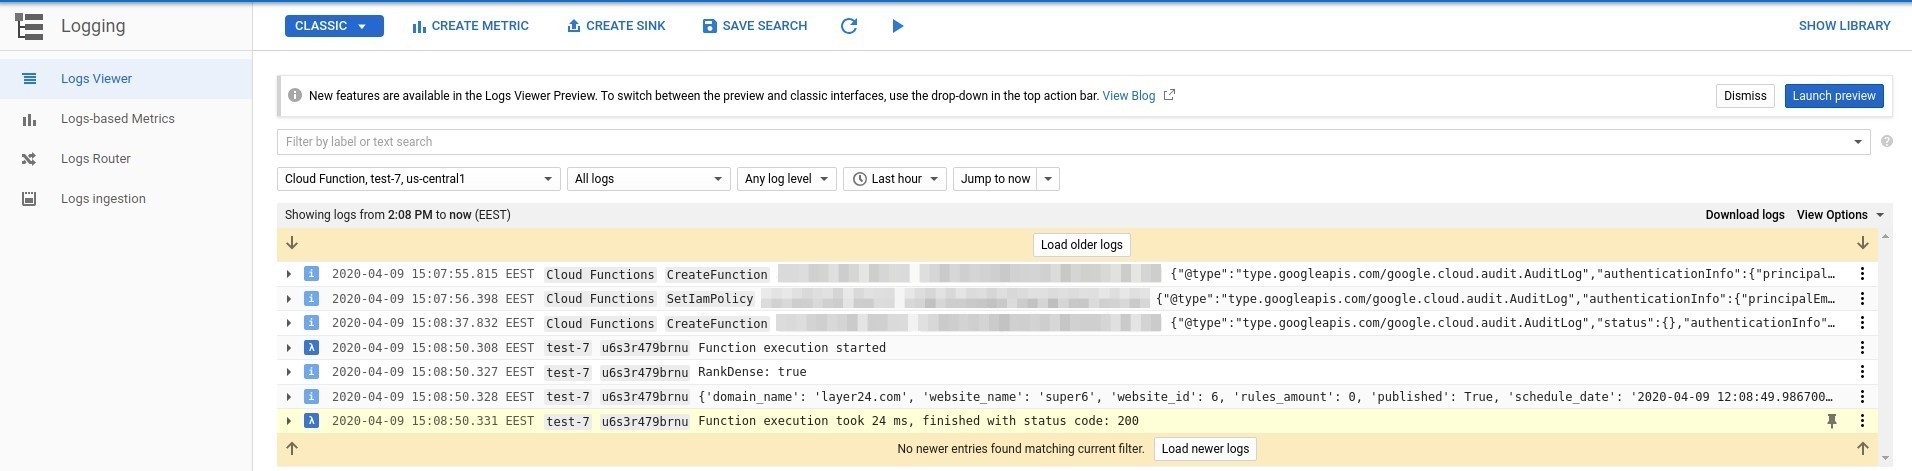
Here is an example of the results from the function: